Key Takeaways
-
Paver stones are 3-4 times stronger than concrete, handling heavy vehicles and harsh weather without cracking
-
Professional installation involves multi-layer foundation preparation, with precise excavation and compaction for long-term stability
-
Choose from concrete, brick, or natural stone pavers to create a custom driveway that complements your home's architecture
-
Site assessment is crucial, evaluating drainage, soil conditions, utilities, and local building codes before installation
-
Budget for driveway paver installation ranges from several thousand to ten thousand dollars, depending on materials and project complexity
-
Maintenance is minimal – regularly sweep, rinse, and address spills to keep your paver driveway looking pristine
-
Professional installation involves systematic paver placement, edge restraints, and specialized joint sand for a durable, unified surface
Have you ever pulled up to a home and immediately noticed the stunning driveway? A well-designed paver driveway does more than just provide a place to park—it sets the tone for your entire property. If you’re considering upgrading from cracked concrete or worn asphalt, you’re about to discover why paver installation has become the preferred choice for homeowners and businesses throughout the greater Chicago area and beyond.
Driveway paver installation transforms your outdoor space with durable, attractive materials that outperform traditional concrete or asphalt. Whether you’re enhancing curb appeal for your home or creating an inviting entrance for your business, understanding the installation process helps you make informed decisions and achieve results you’ll love for decades to come.
In this guide, we’ll walk you through everything you need to know about planning your driveway paver installation, from choosing the right materials to understanding what happens during the installation process. Let’s explore how you can create a driveway that combines beauty, strength, and lasting value.
Understanding the Benefits of Paver Driveways
Before diving into the installation process, it’s helpful to understand why so many homeowners and property managers are choosing pavers over traditional driveway materials. The advantages go far beyond just good looks, though the aesthetic appeal is certainly impressive.
Paver stones are remarkably strong—about three to four times stronger than standard concrete. This means your driveway can handle heavy vehicles, frequent traffic, and the freeze-thaw cycles we experience here in the Midwest without cracking or deteriorating. When you invest in quality materials and proper installation, you’re creating a surface that truly stands the test of time.
Another fantastic benefit is the ease of repair. If a paver becomes damaged or stained, you can simply replace that individual stone rather than tearing up and replacing an entire section. This flexibility saves you money and hassle down the road. Plus, pavers come in an incredible variety of colors, shapes, sizes, and patterns, allowing you to create a completely custom look that reflects your personal style and complements your home’s architecture.
For properties in regions prone to ground movement or seismic activity, pavers offer superior flexibility compared to rigid concrete slabs. They can shift slightly without cracking, making them an excellent choice for areas with challenging soil conditions or extreme weather patterns.

Choosing the Right Paver Materials for Your Driveway
The world of paver materials offers exciting options to suit every budget, style preference, and functional requirement. Understanding your choices helps you select materials that will deliver the performance and appearance you’re looking for.
Concrete Pavers: Versatile and Affordable
Concrete pavers represent the most popular choice for driveway installations, and for good reason. They’re available in countless colors, shapes, and sizes, allowing you to create virtually any design you can imagine. Modern manufacturing techniques produce concrete pavers that mimic the look of natural stone, brick, or even wood, giving you high-end aesthetics at a more accessible price point.
These pavers are manufactured to exacting standards, ensuring consistency in size and quality. Most concrete pavers designed for driveways are specifically engineered to handle vehicle traffic, with thickness and composition optimized for strength and durability. Many manufacturers offer lifetime warranties on their concrete pavers, giving you added peace of mind about your investment.
Brick Pavers: Classic Charm
If you’re drawn to traditional elegance, brick pavers create a timeless look that never goes out of style. They develop a beautiful patina over time, adding character to your property. Brick pavers work particularly well with colonial, Victorian, or historic home styles, but they can complement contemporary designs too.
Clay brick pavers are naturally resistant to fading and maintain their color for decades. They’re slightly more porous than concrete pavers, which can be beneficial for drainage but may require occasional cleaning to prevent moss or algae growth in shaded areas.
Natural Stone Pavers: Premium Elegance
For the ultimate in luxury and uniqueness, natural stone pavers like granite, limestone, or travertine create stunning driveways with one-of-a-kind character. No two natural stone pavers are exactly alike, giving your driveway distinctive beauty that can’t be replicated.
Natural stone tends to be more expensive and may require specialized installation techniques, but the investment pays off in unmatched visual appeal and exceptional durability. Stone pavers can last for generations with proper care and maintenance.

Planning Your Driveway Paver Installation Project
Successful paver installation starts long before the first stone is laid. Thoughtful planning ensures your project runs smoothly and delivers results that exceed your expectations.
Assessing Your Site and Requirements
Begin by evaluating your current driveway and property conditions. Consider these important factors:
- The size and shape of your driveway area
- Existing drainage patterns and water flow
- Soil type and ground stability
- Access for installation equipment and material delivery
- Underground utilities that need protection
- Local building codes and permit requirements
Understanding these elements helps your installation team plan appropriately and avoid surprises during construction. Professional landscaping companies like Serenity Landscape Group conduct thorough site assessments to identify potential challenges and develop solutions before work begins.
Setting a Realistic Budget
Driveway paver installation represents a significant investment in your property, and costs can vary widely based on materials, size, and project complexity. While basic installations might start at a few thousand dollars for small areas, larger custom projects with premium materials can exceed ten thousand dollars.
Consider obtaining detailed quotes from at least three reputable contractors after they’ve visited your site. Quality proposals should outline the scope of work, specific materials, project timeline, and total costs. Remember that the lowest bid isn’t always the best value—look for contractors who demonstrate expertise, provide comprehensive warranties, and have strong reputations in your community.
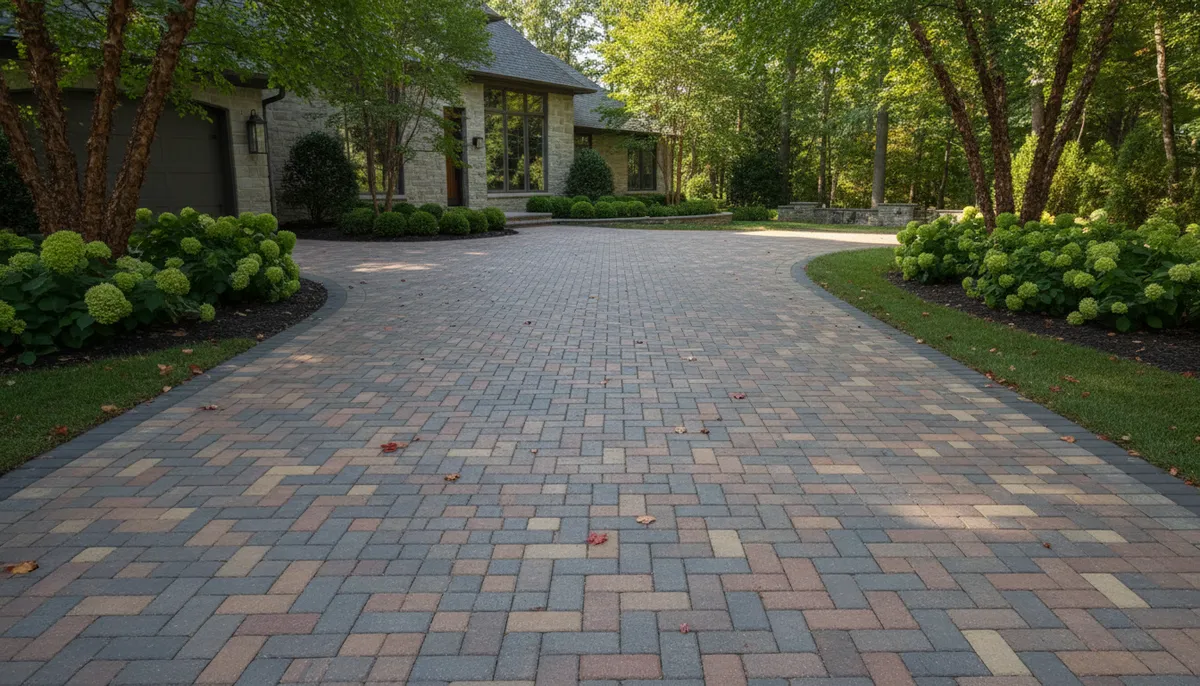
Designing Your Dream Driveway
This is where creativity meets functionality. Work with your installation team to develop a design that enhances your property’s aesthetics while meeting practical requirements. Consider these design elements:
- Color schemes that complement your home’s exterior and landscaping
- Pattern options like herringbone, basketweave, running bond, or circular designs
- Border treatments that frame your driveway and add visual interest
- Integration with existing hardscaping like walkways, patios, or retaining walls
- Lighting considerations for safety and nighttime curb appeal
Many professional installation companies provide design visualization tools or drawings that help you see how different options will look before making final decisions. This collaborative process ensures you’re completely satisfied with the plan before installation begins.
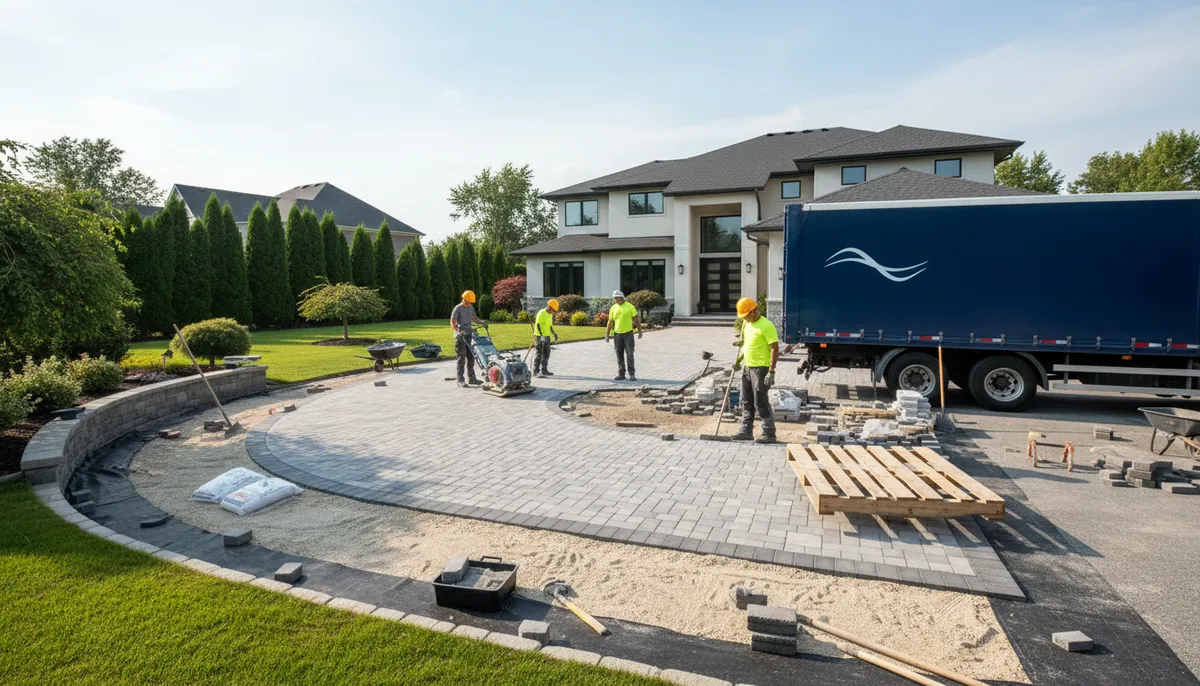
The Professional Installation Process Explained
Understanding what happens during installation helps you appreciate the craftsmanship involved and sets appropriate expectations for your project timeline. Quality paver installation is methodical and detail-oriented, with each step building on the previous one.
Site Preparation and Excavation
Professional installation begins with thorough site preparation. The existing driveway surface is removed, along with any obstacles like tree roots, stumps, or debris that could affect the foundation. The installation area is then excavated to the proper depth, typically between eight and twelve inches, depending on your soil conditions and the expected traffic load.
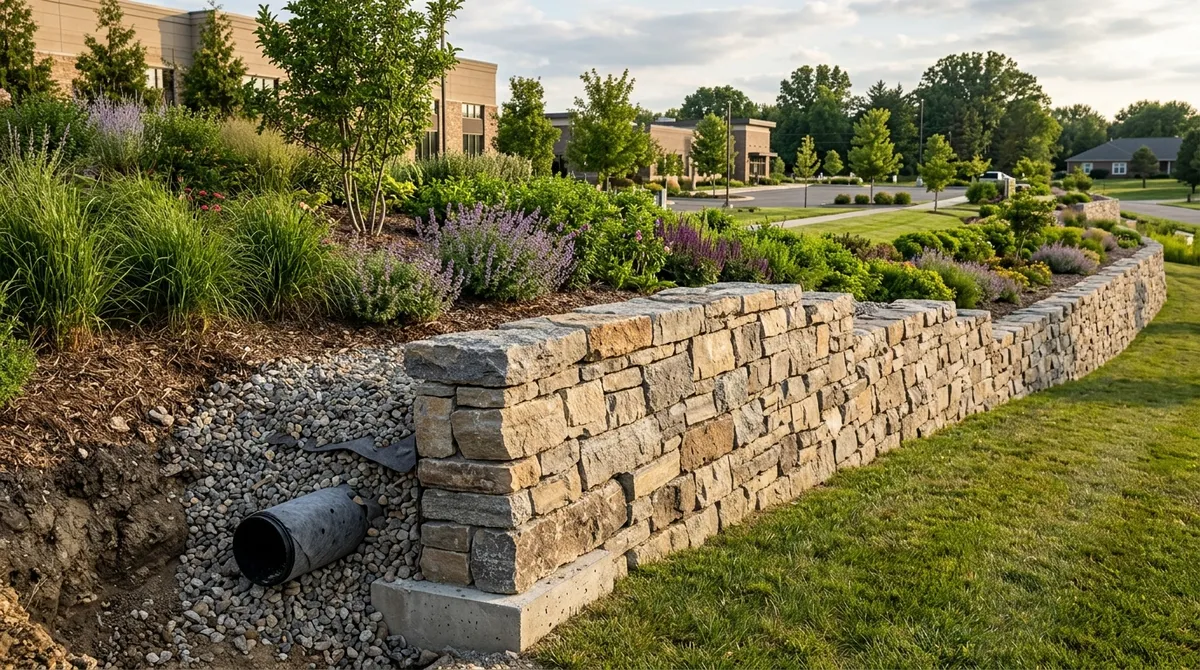
This excavation creates space for the essential foundation layers that give your paver driveway its strength and longevity. The excavated area is carefully graded to ensure proper drainage away from your home or building, preventing water accumulation that could undermine the installation over time.
Building the Foundation Base
The foundation is absolutely critical to a successful paver installation. This isn’t visible once your driveway is complete, but it’s what ensures your pavers remain level, stable, and crack-free for decades. A proper foundation typically consists of multiple layers:
- A compacted gravel sub-base layer, usually four to eight inches thick, provides drainage and load distribution
- A layer of coarse sand creates a leveling bed that allows for precise paver placement
- Optional geotextile fabric between layers prevents soil migration and adds stability
Each layer is carefully compacted using professional-grade equipment to achieve the density and stability necessary to support vehicle traffic. Proper compaction is one of the most important factors in preventing settling or sinking over time.
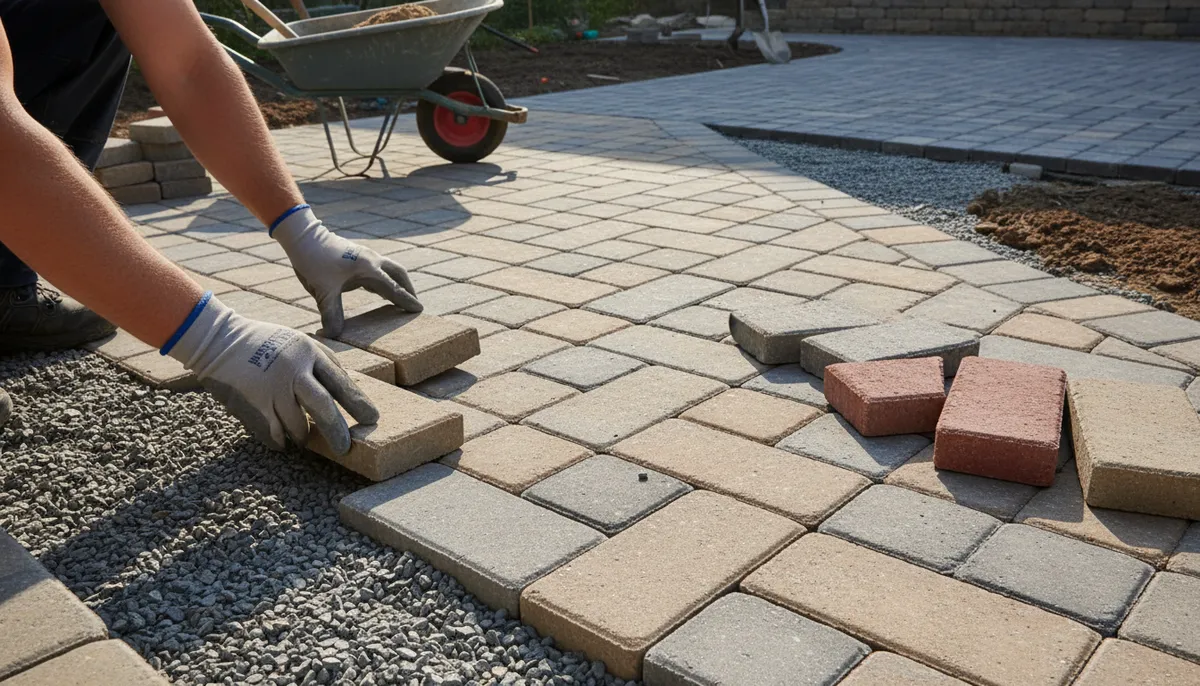
Paver Installation and Pattern Creation
With the foundation prepared, the actual paver installation begins. This is where your design vision comes to life. Professional installers work systematically, placing each paver according to the planned pattern while maintaining consistent spacing for joint sand.
Edge restraints are installed around the perimeter to keep pavers from shifting laterally over time. These restraints are essential for maintaining the integrity of your driveway, especially along edges where vehicle wheels create lateral forces.
During installation, experienced crews make constant adjustments to ensure proper alignment, level, and pattern consistency. They cut pavers as needed to fit around curves, borders, or obstacles, creating clean, professional transitions.
Joint Filling and Final Compaction
Once all pavers are in place, fine polymeric sand is swept into the joints between pavers. This specialized sand helps lock pavers together, prevents weed growth, and resists washout from rain or cleaning. The entire surface is then compacted again with a plate compactor, which settles the pavers into the sand bed and firmly packs the joint sand.
A final layer of joint sand is applied and swept into any remaining gaps. Some installation crews apply a light mist of water to activate polymeric sand, creating an initial bond. The result is a unified, stable surface ready to serve you for years to come.
Preparing Your Property for Installation Day
As your installation date approaches, a few simple preparations help ensure the process goes smoothly and protects your property during construction.
Clearing the Work Area
Remove vehicles, outdoor furniture, planters, and any other items from your driveway and the immediate surrounding area. Installation crews need clear access to the work site and room to maneuver equipment. If you have a garage, consider relocating items temporarily to prevent dust or debris accumulation.
Protecting Your Landscape
Communicate with your installation team about any landscape features near the driveway that need special protection. Professional crews take care to avoid damaging plants, sprinkler systems, or other hardscaping, but knowing about sensitive areas ahead of time allows them to plan accordingly.
Planning for Limited Access
Depending on your driveway configuration, you may need to make alternative parking arrangements during installation. Most residential driveway installations take between three and seven days, though this varies based on size and complexity. Plan ahead for this temporary inconvenience to avoid last-minute scrambling.
| Installation Phase | Typical Duration | What to Expect |
|---|---|---|
| Site Preparation & Excavation | 1-2 days | Heavy equipment, noise, removal of old materials |
| Base Installation | 1-2 days | Delivery of gravel and sand, compaction equipment |
| Paver Installation | 1-3 days | Paver delivery, cutting equipment, pattern placement |
| Finishing & Cleanup | 1 day | Joint filling, final compaction, site cleanup |
Caring for Your New Paver Driveway
One of the wonderful aspects of paver driveways is their relatively low maintenance requirements. With simple, regular care, your investment will continue looking beautiful and performing well for decades.
Regular Cleaning and Maintenance
Keep your driveway looking its best with these simple maintenance practices:
- Sweep regularly to remove dirt, leaves, and debris that can accumulate in joints
- Rinse with a garden hose periodically to wash away surface dirt and prevent staining
- Use a pressure washer occasionally for deeper cleaning, but avoid excessive pressure that could dislodge joint sand
- Address oil or fluid spills promptly with appropriate cleaning products to prevent permanent staining
- Remove weeds that occasionally sprout between pavers, or apply environmentally-friendly weed prevention treatments
These routine tasks take minimal time but make a significant difference in maintaining your driveway’s appearance and preventing minor issues from becoming major problems.
Joint Sand Replenishment
Over time, joint sand can gradually wash away or settle, especially after heavy rains or aggressive cleaning. Check your joints annually and add fresh polymeric sand as needed to maintain proper spacing and interlock. This simple maintenance task helps prevent pavers from shifting and keeps your driveway stable.
Sealing for Enhanced Protection
While not strictly necessary, applying a quality paver sealer every few years offers several benefits. Sealers enhance color vibrancy, provide stain resistance, and make cleaning easier. They also help stabilize joint sand and can reduce weed growth. Discuss sealing options with your installation contractor to determine if this additional protection makes sense for your specific situation.
Working with Professional Installation Contractors
The quality of your paver driveway depends heavily on the expertise of your installation team. Choosing the right contractor sets the foundation for a successful project and long-term satisfaction.
What to Look for in a Paver Installation Company
Not all landscaping companies have equal experience with paver installation. Look for contractors who demonstrate:
- Extensive experience specifically with paver driveway projects, not just general landscaping
- Proper licensing, insurance, and certifications from industry organizations
- Strong local reputation with verifiable references and online reviews
- Comprehensive warranties covering both materials and workmanship
- Detailed written proposals that clearly outline scope, timeline, and costs
- Professional communication and responsiveness throughout the consultation process
Companies like Serenity Landscape Group bring over two decades of specialized experience to every paver installation project, combining technical expertise with artistic vision to create driveways that enhance your property’s value and appeal.
Understanding Warranties and Guarantees
Quality installation contractors stand behind their work with substantial warranties. Manufacturer warranties on the pavers themselves often extend for the lifetime of the original installation, covering defects in materials. Installation warranties typically cover workmanship for periods ranging from two to ten years or more.
Review warranty terms carefully and understand what’s covered and what circumstances might void coverage. Keep all warranty documentation in a safe place for future reference. Reputable contractors are proud of their warranties and happy to explain coverage details.
Communication Throughout Your Project
Clear, consistent communication makes every construction project run more smoothly. Your contractor should keep you informed about schedule changes, answer questions promptly, and address any concerns that arise during installation. Don’t hesitate to ask for clarification about any aspect of the process—professional contractors welcome questions and want you to feel confident about your investment.
Cost Considerations and Value Factors
Understanding the financial aspects of paver driveway installation helps you make informed decisions and appreciate the value you’re receiving for your investment.
Factors That Influence Installation Costs
Several variables affect the total cost of your paver driveway project:
- Driveway size and square footage
- Paver material selection (concrete vs. natural stone vs. brick)
- Design complexity and pattern intricacy
- Site accessibility and preparation requirements
- Need for drainage improvements or grading adjustments
- Local labor rates and material availability
- Additional features like borders, lighting, or decorative elements
While it’s natural to focus on upfront costs, remember to consider long-term value. A properly installed paver driveway requires minimal maintenance, rarely needs major repairs, and typically lasts thirty to fifty years or more. When amortized over its lifespan, the cost per year becomes quite reasonable compared to surfaces that require frequent resurfacing or replacement.
Comparing Pavers to Alternative Materials
To put paver costs in perspective, consider alternatives like asphalt or concrete. Asphalt driveway resurfacing typically costs two to three dollars per square foot but requires resealing every few years and complete replacement every fifteen to twenty years. Concrete driveway resurfacing averages three to ten dollars per square foot, with similar longevity limitations and virtually no repair options for cracks.
Pavers represent a higher initial investment but deliver superior aesthetics, easier repairs, and significantly longer lifespan. For many homeowners and property managers, the enhanced curb appeal and lasting durability make pavers the smart choice.
| Driveway Material | Average Cost per Sq Ft | Expected Lifespan | Maintenance Level |
|---|---|---|---|
| Asphalt | $2-$5 | 15-20 years | Regular sealing required |
| Concrete | $4-$10 | 20-30 years | Sealing recommended |
| Concrete Pavers | $10-$20 | 30-50+ years | Minimal maintenance |
| Natural Stone Pavers | $20-$40+ | 50-100+ years | Minimal maintenance |
Seasonal Considerations for Installation
Timing your paver installation project appropriately ensures optimal results and can even affect your overall costs and experience.
Best Times of Year for Installation
In the greater Chicago area and similar climates, late spring through early fall typically offers the best conditions for paver installation. Moderate temperatures and drier weather allow for efficient work and proper material curing. Ground conditions are ideal—not frozen in winter or muddy from spring thaws.
That said, experienced contractors can work year-round with appropriate adjustments. Fall installations often come with scheduling advantages and sometimes more competitive pricing as the busy season winds down.
Weather-Related Considerations
Professional installation teams monitor weather forecasts closely and may adjust schedules to avoid working in heavy rain or extreme temperatures. While this can occasionally extend project timelines, it ensures proper installation that will perform well for decades. The foundation layers, in particular, require appropriate conditions for proper compaction and settling.
Enhancing Your Overall Landscape Design
Your new paver driveway doesn’t exist in isolation—it’s part of your complete outdoor environment. Consider how your driveway installation can integrate with and enhance your broader landscaping vision.
Coordinating with Other Hardscape Elements
If you’re planning or have existing paver features like patios, walkways, or pool decks, coordinate materials and patterns to create visual harmony throughout your property. Matching or complementary pavers tie different outdoor spaces together, creating a cohesive, professionally designed appearance.
Consider extending your paver theme to other areas for maximum impact. Retaining walls with coordinating colors, fire pit surrounds, or pergola foundations all contribute to a unified outdoor aesthetic.
Lighting Your Driveway for Safety and Beauty
Strategic landscape lighting transforms your paver driveway from purely functional to truly spectacular after dark. Well-placed fixtures enhance safety by illuminating the driving surface and edges, while also showcasing your beautiful new pavers and creating inviting curb appeal for evening arrivals.
Consider these lighting options for your driveway:
- Low-voltage path lights along borders that define edges and guide visitors
- Uplights that highlight nearby trees or architectural features
- Subtle recessed lights within retaining walls flanking your driveway
- Post lights at the driveway entrance that welcome guests
Professional landscape lighting design creates layers of illumination that work together harmoniously, avoiding harsh spotlights while providing adequate visibility and ambiance.
Making Your Investment Count
A beautifully installed paver driveway represents more than just an upgraded surface—it’s an investment in your property’s value, functionality, and aesthetic appeal. By understanding the installation process, choosing quality materials and contractors, and planning thoughtfully, you set yourself up for decades of satisfaction.
Remember that the foundation determines everything. Proper site preparation, adequate base materials, and expert installation techniques are worth every penny. While it might be tempting to cut corners or choose the lowest bid, the difference between adequate and excellent installation becomes apparent over time in how your driveway performs and ages.
Your driveway is often the first impression visitors have of your property. It frames your home or business, sets the tone for what lies beyond, and serves you countless times every single day. Choosing professional paver installation means choosing quality, beauty, and peace of mind.
Taking the Next Step Toward Your Dream Driveway
Now that you understand what goes into successful paver driveway installation, you’re ready to move forward with confidence. The transformation waiting for your property combines enhanced curb appeal with practical durability that serves you well through every season.
At Serenity Landscape Group, we’ve spent over twenty years helping homeowners and businesses throughout the greater Chicago area create outdoor spaces they absolutely love. From initial design consultation through final installation and beyond, we’re committed to exceeding your expectations and delivering results that stand the test of time.
We invite you to explore our proven process for landscape transformations, check out our portfolio of completed projects for inspiration, or learn more about our team and commitment to excellence.
Your dream driveway is closer than you think. Whether you’re ready to start your project or simply want to discuss possibilities, we’re here to help. Contact us today for your free estimate and discover how we can transform your outdoor space into something truly special. Let’s create a driveway that welcomes you home with beauty and serves you reliably for decades to come.
FAQs
Q: How long does a paver driveway last compared to concrete or asphalt?
A: A properly installed paver driveway typically lasts thirty to fifty years or more with minimal maintenance, significantly outlasting asphalt (fifteen to twenty years) and concrete (twenty to thirty years). The individual paver design also makes repairs much easier—you can replace single damaged pavers rather than resurfacing entire sections, which extends the overall lifespan even further.
Q: Can I drive on my new paver driveway immediately after installation?
A: While pavers are technically stable immediately after installation, most professional contractors recommend waiting at least twenty-four to forty-eight hours before driving on your new driveway. This allows the joint sand to settle properly and ensures the edge restraints are fully secure. Your installation team will provide specific guidance based on your project details and weather conditions.
Q: What’s the difference between regular sand and polymeric sand for paver joints?
A: Polymeric sand contains special additives that activate when moistened, creating a binding effect that locks pavers together more effectively than regular sand. It resists washout from rain or cleaning, inhibits weed growth, and helps prevent ants and other insects from burrowing between pavers. While slightly more expensive than regular sand, polymeric sand provides superior long-term performance and reduces maintenance requirements.
Q: How do I choose between concrete pavers and natural stone for my driveway?
A: Your decision should balance budget, aesthetic preferences, and maintenance expectations. Concrete pavers offer excellent durability at a more accessible price point with consistent sizing and countless design options, making them ideal for most residential driveways. Natural stone provides unmatched visual appeal and uniqueness but comes at a premium price and may require occasional sealing. Both options are significantly stronger than standard concrete driveways and provide decades of service when properly installed.
Q: Will a paver driveway increase my home’s resale value?
A: Yes, a professionally installed paver driveway typically increases property value and enhances curb appeal, which helps homes sell faster and often at higher prices. While exact return on investment varies by location and market conditions, real estate professionals consistently note that attractive, well-maintained driveways create positive first impressions and differentiate properties from similar homes in the neighborhood. The durability and low maintenance requirements also appeal to potential buyers who appreciate quality upgrades.