Key Takeaways
-
Build a properly compacted base by excavating 3-4 inches of soil and installing 2-3 inches of compacted aggregate; this foundation prevents dips, soft spots, and drainage problems for years.
-
Plan drainage carefully with a 1-2% slope to guide water away from your home and prevent ponding, odors, and uneven base settling that commonly causes premature turf failure.
-
Skip DIY installation and hire professionals certified by programs like ICPI; improper seaming, base work, or edge securing causes bubbling, sagging, and failure within 1-3 years.
-
Choose turf materials matched to your specific use: pet areas need antimicrobial backing, play spaces require safety-rated infill, and rooftop installations need lightweight systems designed for hard surfaces.
-
Expect professional installation costs of $8-$20 per square foot depending on complexity; upfront investment in proper drainage and base work prevents much costlier repairs or complete replacement later.
-
Maintain your turf with simple habits: remove debris regularly, rinse away dust and pet waste, brush high-traffic areas, and inspect seams twice yearly to extend lifespan to 10-15+ years.
Ever daydreamed about a lawn that stays green all summer, never needs mowing, and doesn’t turn into a mud pit every spring? That’s the magic of installing artificial turf done right. But here’s the thing your neighbor probably won’t tell you: the difference between a turf lawn you love for fifteen years and one that bubbles, sags, or smells by year three comes down to just a few critical steps.
We’ve spent over two decades helping Chicago-area homeowners, condo owners, property managers, and business owners fall in love with their outdoor spaces again. And when it comes to installing artificial turf, we’ve learned that success isn’t complicated. It just takes doing three things correctly: building the right base, managing drainage properly, and choosing the right materials for your specific space. Let’s walk through exactly what that looks like, so you can make smart decisions whether you’re hiring a pro or just want to understand what good work looks like.
Why Installing Artificial Turf Is More Than Rolling Out Fake Grass
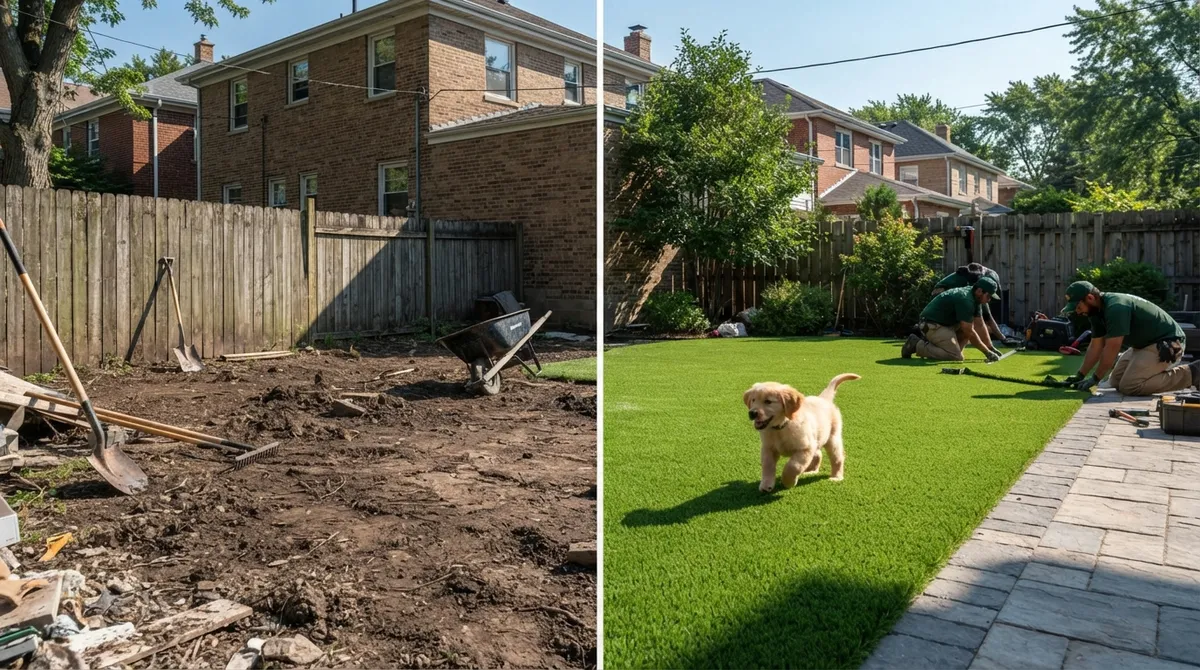
A lot of people picture artificial turf installation like laying down a carpet. Unroll it, tack it down, done. That’s simply not how it works, and that misunderstanding is why so many DIY jobs end up looking lumpy or failing within a year or two.
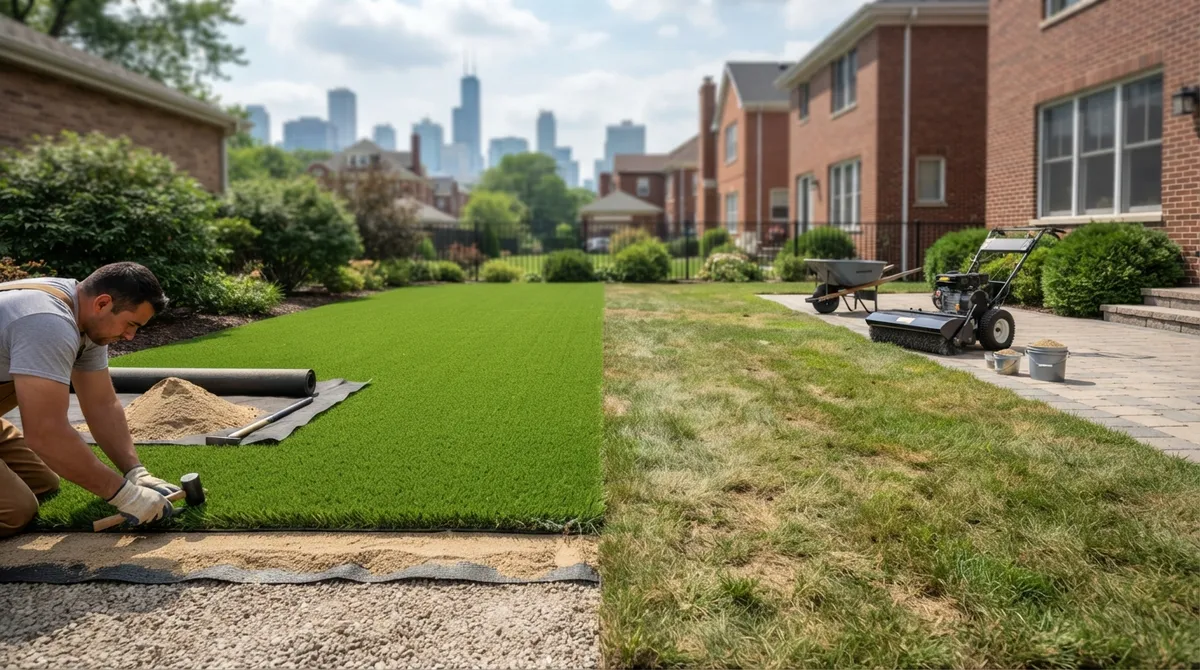
Professional installing artificial turf is really a small site-engineering project. It involves removing old grass and topsoil, grading the ground, compacting a solid aggregate base, laying a weed barrier, fitting and seaming the turf itself, securing every edge, spreading infill, and grooming the fibers so they stand up nicely. Skip any one of these steps, and you’ll likely see problems down the road.
This is exactly why suburban homeowners dealing with Chicago’s heavy clay soil, urban condo owners with tricky rooftop spaces, and commercial property managers overseeing large courtyards all benefit from working with an experienced team. Our artificial turf installation crews handle every layer of the process, so nothing gets rushed or skipped.
Step 1: Build a Base That Won’t Let You Down
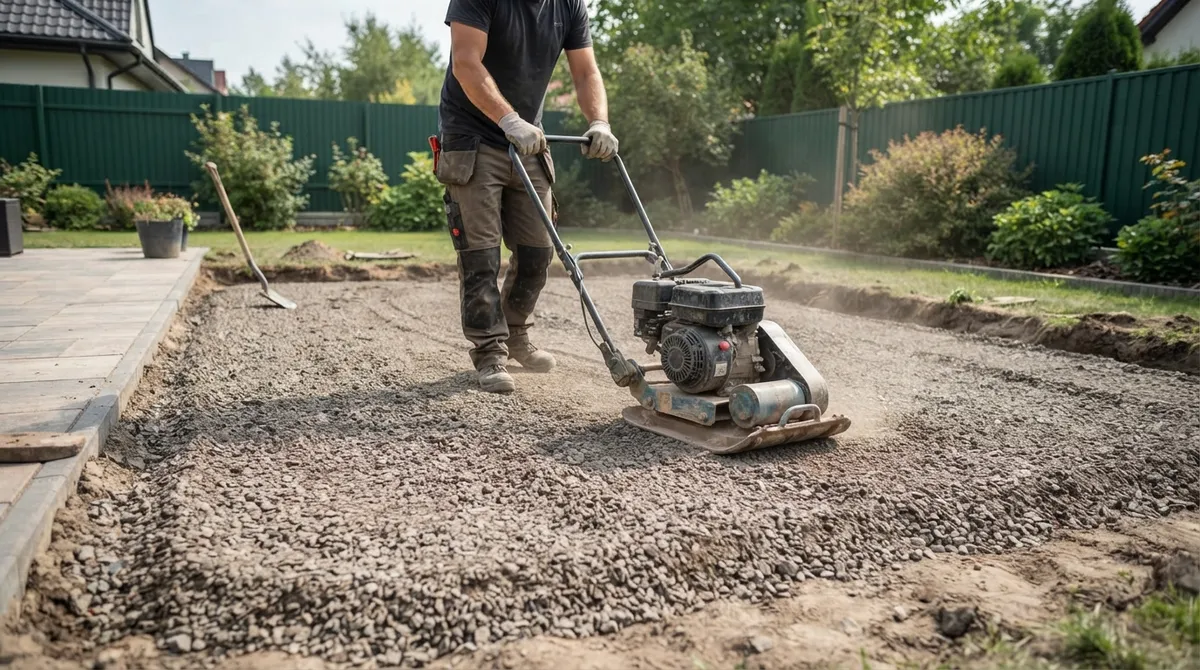
Think of the base as the foundation of your turf lawn. Just like a house needs solid footings, artificial turf needs a stable, well-compacted base underneath it. Get this wrong, and you’ll deal with dips, soft spots, and drainage headaches for years.
What Proper Excavation Looks Like
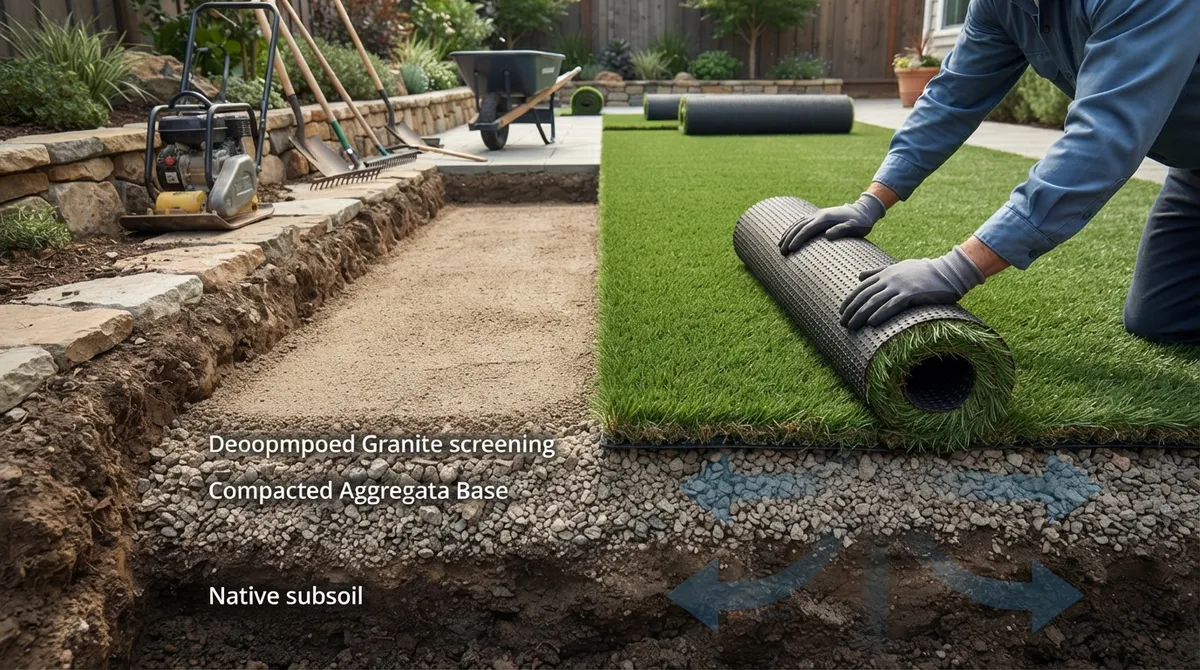
Most residential turf installations start with excavating about 3 to 4 inches of soil. This removes old grass, roots, and loose dirt that could shift or settle later. Then comes a 2 to 3 inch layer of compacted aggregate, often crushed stone or decomposed granite, depending on your soil type and how the space will be used.
The exact depth can change based on a few factors:
- Your existing soil composition (Chicago’s clay-heavy soil often needs extra attention)
- Whether the area will see heavy foot traffic, like a play space or dog run
- Local drainage needs and how much rain or snowmelt the area handles
- The overall climate and freeze-thaw cycles typical of Illinois winters
This base layer gets compacted firmly, creating a stable surface that won’t shift or sink. Homeowners in Aurora and surrounding suburbs, working with new home builders on turnkey properties, especially benefit from this careful groundwork since it protects your investment for the long haul.
Step-by-Step: The Installation Process
- Remove existing grass, roots, and topsoil from the project area
- Grade the soil to create proper slope and eliminate low spots
- Install and compact the aggregate base layer
- Lay a permeable weed barrier fabric over the compacted base
- Roll out turf panels, matching pile direction across all pieces
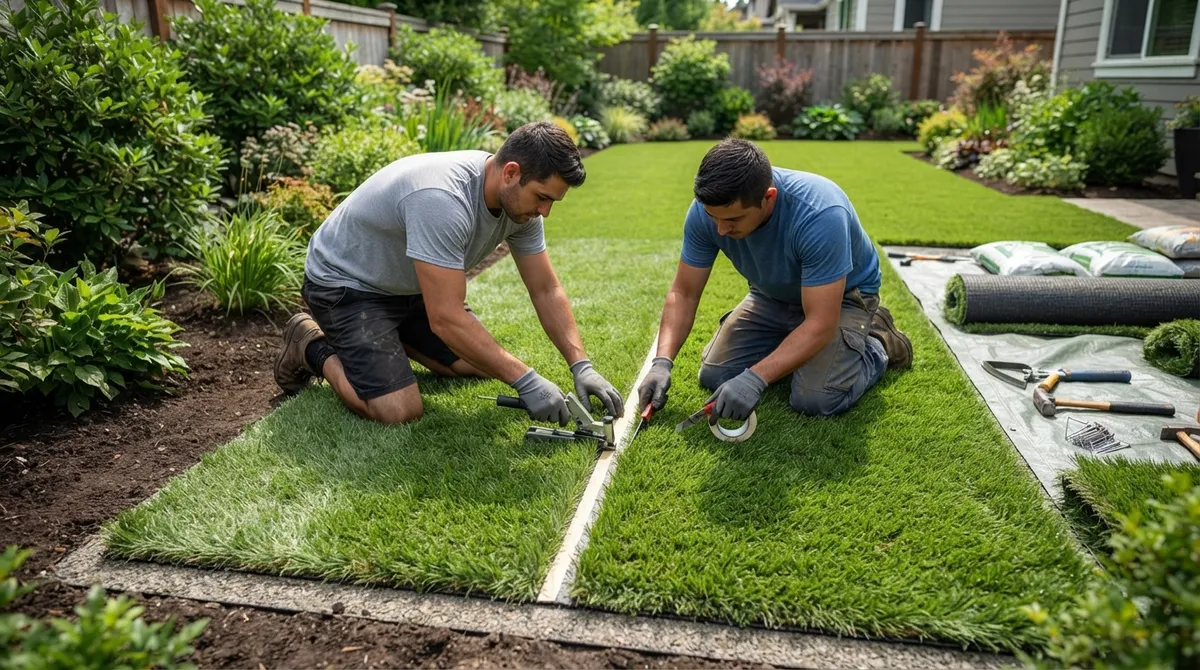
- Seam edges together using manufacturer-approved tape and adhesive
- Secure all edges and perimeters with corrosion-resistant fasteners
- Apply infill material and groom fibers to finish the look
Following this order matters. Rushing or skipping steps is one of the most common mistakes we see when homeowners attempt DIY projects or hire inexperienced crews.
Step 2: Never Skip Drainage Planning
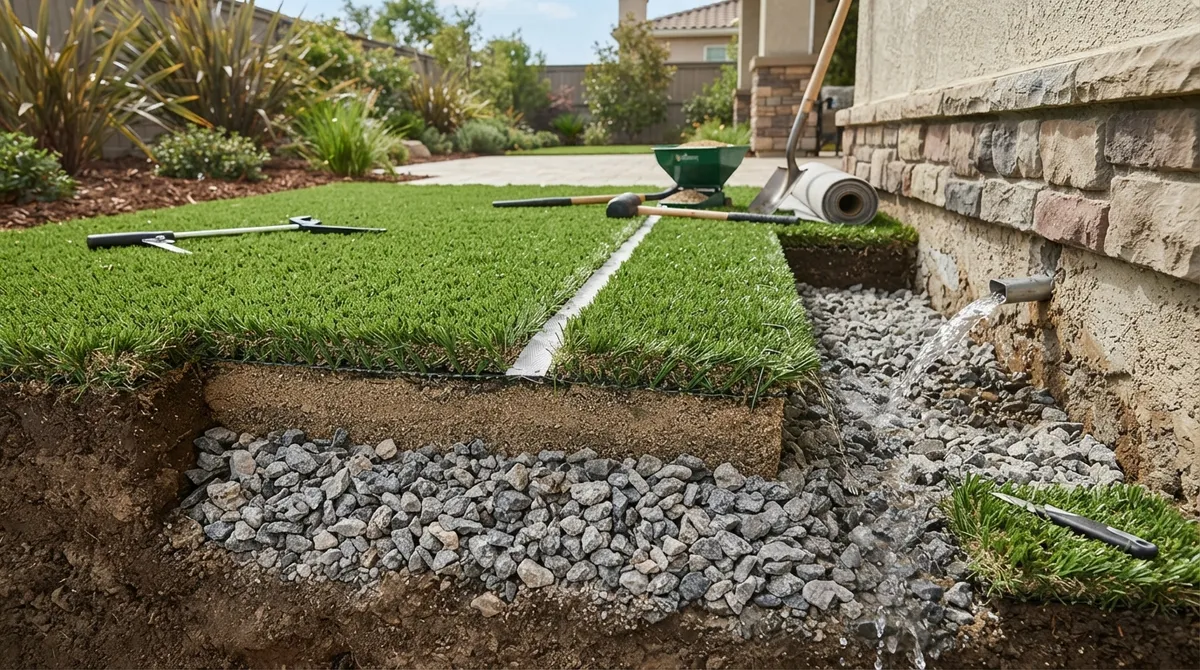
If there’s one thing that separates a turf lawn that lasts decades from one that fails early, it’s drainage. Poor drainage planning causes ponding, bad odors, and can even lead to the base settling unevenly over time.
A skilled installer will study your yard’s existing grade before starting any work. The goal is to avoid creating low spots where water collects. Most professional installations include a slight slope, typically around 1% to 2%, that guides water away from your home’s foundation and toward proper drainage points.
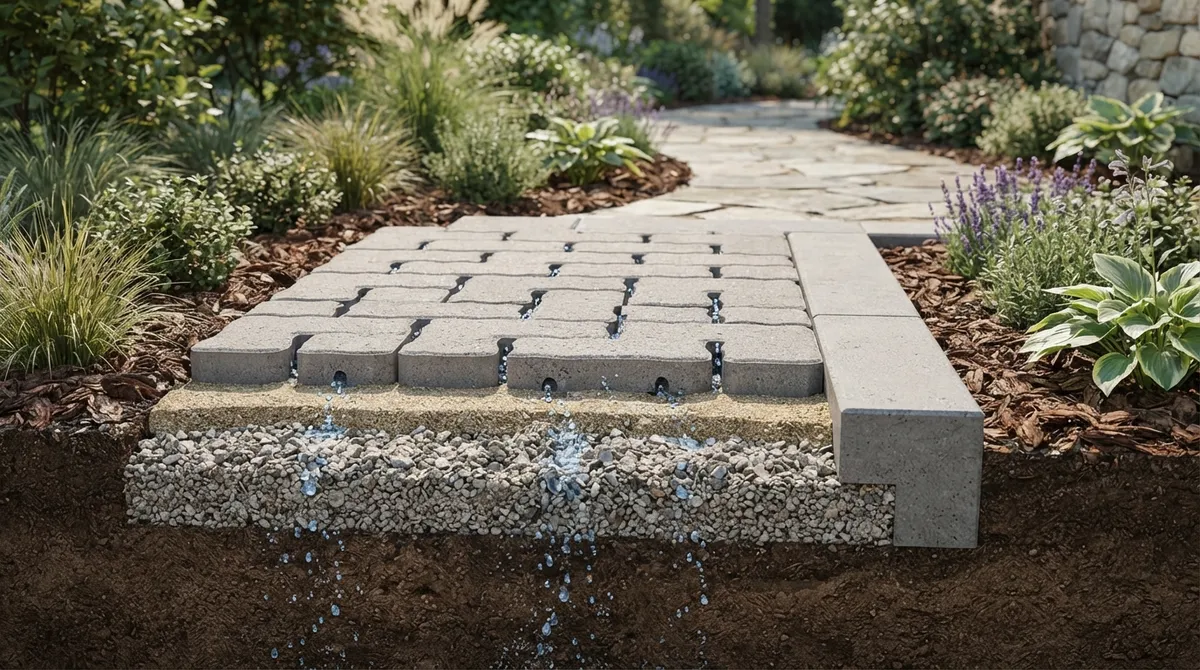
Permeable turf backing also plays a big role here. Water needs somewhere to go, and a quality turf system lets rainwater pass through the surface into the base layer below, rather than pooling on top. This is especially important for commercial property managers dealing with stormwater regulations, and for suburban homeowners hoping to meet HOA standards while avoiding backyard flooding.
| Drainage Scenario | Typical Added Cost | Best For |
|---|---|---|
| Basic drainage improvements | $2–$3 per sq ft | Standard yards with mild slope issues |
| Complex drainage systems | $6–$8 per sq ft | Low-lying yards, heavy clay soil, or flat rooftops |
| Standard base with proper grading | Included in base install | Most residential lawns with decent existing grade |
If your property has struggled with standing water or soggy patches, it’s worth having a professional evaluate your drainage before installing artificial turf. This upfront investment prevents much bigger headaches later, including turf that smells or shifts out of place.
Step 3: Choose the Right Materials for Your Space
Not all artificial turf is created equal, and picking the wrong product for your situation is a common and costly mistake. The right choice depends on how you’ll use the space, how much sun it gets, and who (or what) will be walking on it daily.
Matching Turf to Your Lifestyle
Here are some common applications we see across the Chicago area, each with different material needs:
- Residential lawns: Need a natural look with good UV stability for sunny yards
- Pet areas: Require antimicrobial backing and specialized infill for odor control
- Play spaces: Need extra cushioning and safety-rated infill materials
- Pool surrounds: Benefit from heat-resistant fibers and fast-draining backing
- Rooftop and balcony spaces: Require lightweight systems designed for urban condo owners
- Narrow side yards: Perfect for spaces where natural grass struggles to grow
Urban condo owners dealing with limited rooftop space often need turf systems specifically designed for those unique conditions, including proper drainage layers that work on hard surfaces. Meanwhile, small business owners creating pedestrian-friendly landscapes for restaurants and shops need turf that handles heavy foot traffic without matting down.
Understanding Infill Options
Infill is the material spread across the turf surface that helps fibers stand upright and adds stability. Common options include silica sand, coated sand, and organic materials like cork. Manufacturer guidelines typically call for applying infill at a rate of roughly 5 to 8 kilograms per square meter, though your installer should confirm the correct amount for your specific product.
Choosing infill isn’t one-size-fits-all. If you have pets, you’ll want odor-resistant options. If kids will be playing on the surface, safety and cushioning matter more. Commercial properties may have local restrictions on certain infill types, so it’s worth checking with your installer about what’s allowed in your municipality.
What Does Installing Artificial Turf Actually Cost?
Pricing varies quite a bit depending on your project’s size, complexity, and location. Here’s a general breakdown based on current 2026 market data to help you budget realistically.
| Installation Type | Typical Cost Per Sq Ft | Notes |
|---|---|---|
| DIY materials only | $4–$6 | Excludes labor, base work, and drainage |
| Standard professional install | $8–$15 | Includes prep, base, seams, and infill |
| Premium professional install | $15–$20 | Complex sites, high-end turf, extensive drainage |
Several factors influence where your project falls in this range, including excavation depth, site access, product quality, and local labor rates. Commercial property managers and new home builders working on larger projects often see better per-square-foot pricing due to economies of scale. For an accurate number tailored to your property, it’s always best to get a free estimate rather than relying on general averages.
Caring for Your New Turf Lawn
One of the biggest perks of installing artificial turf is how little maintenance it needs compared to natural grass. No mowing, no fertilizing, no weekly watering. That said, “low-maintenance” doesn’t mean “no maintenance.”
Here’s what keeping your turf looking great actually involves:
- Remove leaves, sticks, and debris regularly with a leaf blower or soft rake
- Rinse away dust and pet waste with water as needed
- Brush high-traffic areas periodically to keep fibers standing upright
- Pull any weeds that try to sprout along the perimeter edges
- Inspect seams, edges, and infill levels once or twice a year
These simple habits go a long way toward extending your turf’s lifespan. Most quality installations last well over a decade with proper care, making the upfront investment pay off many times over.
The Environmental Conversation Worth Having
We believe in being upfront with our clients, so let’s talk honestly about sustainability. Installing artificial turf does reduce water use significantly. Some studies suggest water savings of roughly 33% to 50% compared to natural grass lawns, which matters a lot during dry Chicago summers.
However, manufacturing synthetic turf does require energy, and there are legitimate questions about end-of-life disposal and potential infill runoff. A trustworthy landscaping partner should discuss product composition, expected lifespan, and disposal options honestly rather than claiming turf is a perfect environmental solution. Organizations like Landscape Illinois offer helpful resources on sustainable landscaping practices across our region, including how synthetic and natural solutions each have their place.
Why Professional Installation Matters
We get it. DIY projects can be tempting, especially with so many online tutorials promising quick results. But installing artificial turf correctly requires specific tools, experience reading soil conditions, and knowledge of proper seaming techniques that most homeowners simply don’t have on hand.
Working with installers who follow standards set by organizations like the ICPI Certified Installer program ensures your project meets professional benchmarks for durability and craftsmanship. This matters whether you’re a homeowner wanting a backyard that meets HOA standards, or a commercial property manager needing hardscaping that holds up under heavy foot traffic year after year.
Our team has spent over 20 years perfecting this process throughout the greater Chicago area, and we’d genuinely love to walk you through our design and installation process so you know exactly what to expect. We also invite you to browse our gallery of completed projects to see the kind of craftsmanship that comes from decades of hands-on experience.
Bringing It All Together
Installing artificial turf successfully really does come down to these three fundamentals: a properly built base, smart drainage planning, and choosing materials suited to your space and lifestyle. Get these right, and you’ll enjoy a beautiful, low-maintenance lawn for many years to come.
Whether you’re a suburban homeowner tackling tricky clay soil, a condo owner dreaming of a rooftop oasis, or a property manager looking to boost curb appeal across a commercial site, the right installation approach makes all the difference. We’d be honored to help bring your vision to life, just as we’ve done for so many happy clients across Chicagoland.
Ready to see what a beautifully installed turf lawn could look like at your property? Get a free estimate from our experienced team today, or simply call us at (630) 359-5139 to chat about your project. We’d love to help you experience the Serenity difference.
FAQs
Q: How much does it cost to install artificial turf per square foot?
A: Great question! Professional installation typically runs about $8 to $20 per square foot, depending on your site’s complexity and the turf quality you choose. The best way to know your exact number is to get a free, no-pressure estimate tailored to your specific yard.
Q: What preparation is needed before installing artificial turf?
A: Before any turf goes down, we remove old grass and topsoil, grade the area properly, and build a compacted aggregate base. This groundwork is honestly the most important part of the whole process, so don’t let anyone skip it to save time or money.
Q: Does artificial turf need drainage?
A: Absolutely, yes! Good drainage keeps your turf from developing soggy spots, odors, or premature wear. A skilled installer will grade your yard with a slight slope, usually around 1% to 2%, so water flows away from your home instead of pooling.
Q: How long does professional artificial turf installation take?
A: Most residential projects wrap up within a few days to about a week, depending on the size and complexity of your yard. Larger commercial spaces or properties needing extensive drainage work may take a bit longer, but we’ll always give you a clear timeline upfront.
Q: How long does artificial turf last, and when should it be replaced?
A: With proper installation and basic care, quality artificial turf typically lasts 10 to 15 years or more. You’ll know it’s time for a refresh if you notice matting that won’t bounce back, fading, or seams that have started separating despite regular maintenance.