Key Takeaways
-
Professional installation is essential for durability and appearance—properly installed artificial turf lasts 15-20 years versus 10-12 years for DIY, with optimized drainage and nearly invisible seams.
-
Site assessment and proper excavation depth (3-4 inches) are critical first steps that prevent drainage problems, uneven surfaces, and tripping hazards—skipping assessment causes costly issues later.
-
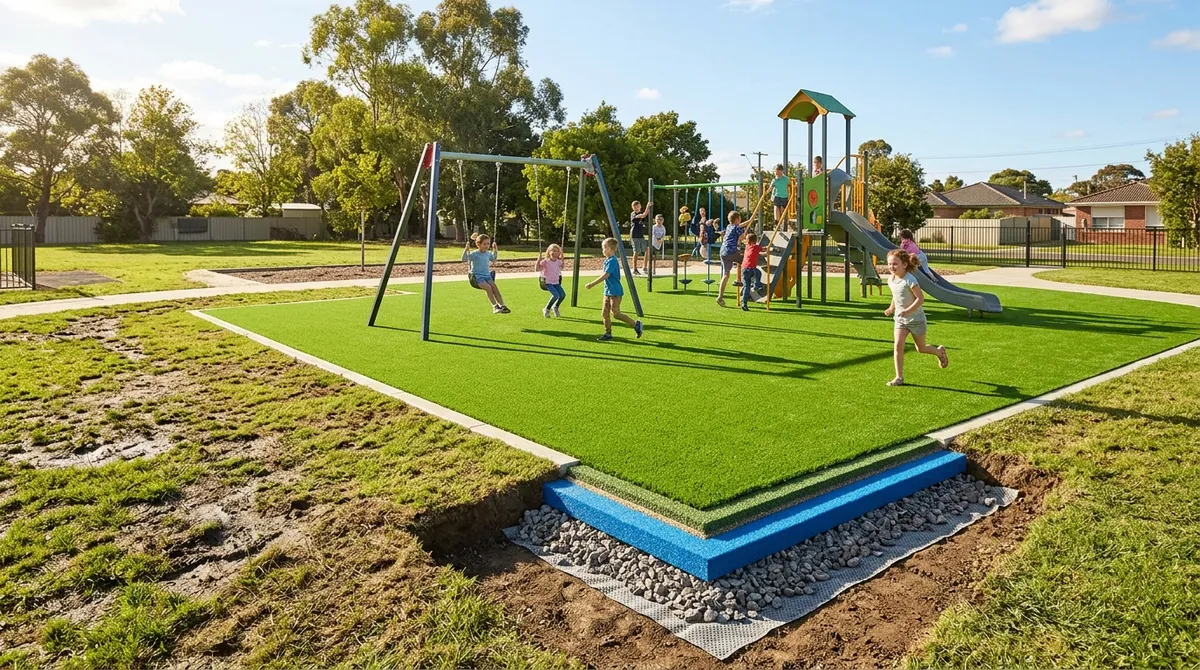
The base layer (2-4 inches of compacted crushed stone or decomposed granite with weed barrier fabric) is the foundation for stability, drainage, and longevity—getting this step wrong undermines everything above it.
-
Professional seaming techniques using seam cloth and synthetic adhesive with precisely matched grain direction create virtually invisible seams, while poor seaming is the most visible sign of amateur installation.
-
Proper perimeter securing with nylon spikes every 3-6 inches plus infill material application and fiber grooming are finishing touches that prevent shifting and ensure a natural, vibrant appearance.
-
Post-installation maintenance is minimal compared to natural grass—occasional rinsing, yearly fiber brushing, and prompt debris removal keep artificial turf looking new for years without mowing or fertilizing.
Thinking about swapping your high-maintenance lawn for lush, green artificial turf? You’re not alone. Homeowners and business owners across the Chicago area are making the switch in 2026 — and for good reason. No more mowing, watering, or fighting with brown patches every summer. But before you enjoy that gorgeous, low-maintenance lawn, it helps to understand exactly how the installation process works.
Whether you’re a suburban homeowner, a condo owner with rooftop space, or a commercial property manager looking to boost curb appeal, knowing the artificial turf installation process helps you set realistic expectations and make smarter decisions. Let’s walk through everything you need to know — from the very first step to the final finishing touches.

Why the Installation Process Matters More Than You Think
Many people assume artificial turf is simply rolled out like a carpet. In reality, a proper installation is a multi-step process that requires skill, the right materials, and careful attention to detail. Professional turf installation versus DIY makes a huge difference in how long your turf lasts and how good it looks.
A poorly installed artificial lawn can result in uneven surfaces, poor drainage, visible seams, and a lifespan that’s cut dramatically short. Getting it right from the start saves you time, money, and frustration in the long run. According to Landscape Illinois, proper installation practices are essential to achieving durable, high-performing outdoor surfaces across the Midwest’s challenging climate conditions.
The 5-Step Process of Artificial Turf Installation Explained
The 5-step process of artificial turf installation is the industry-standard method used by landscaping professionals to ensure your synthetic lawn looks great and performs even better. Here’s a breakdown of each stage.
Step 1: Site Assessment and Planning
Every great installation starts with a thorough site assessment. This is where a professional landscaper evaluates your yard or outdoor space before a single shovel hits the ground. It’s the most important step — and one that DIYers often skip, which leads to problems later.
During this phase, your installer will look at:
- Soil type and existing drainage patterns
- Existing vegetation, roots, and debris that need removal
- The slope of the land and how water naturally flows
- Accessibility for equipment and material delivery
- Accurate measurements of the installation area
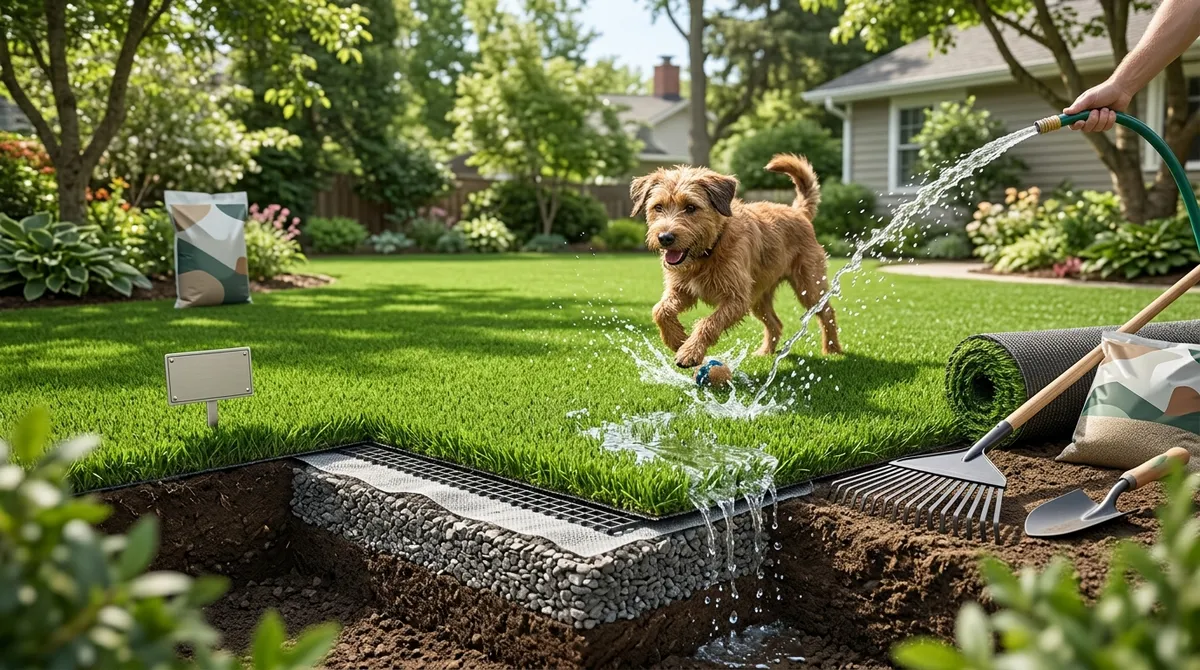
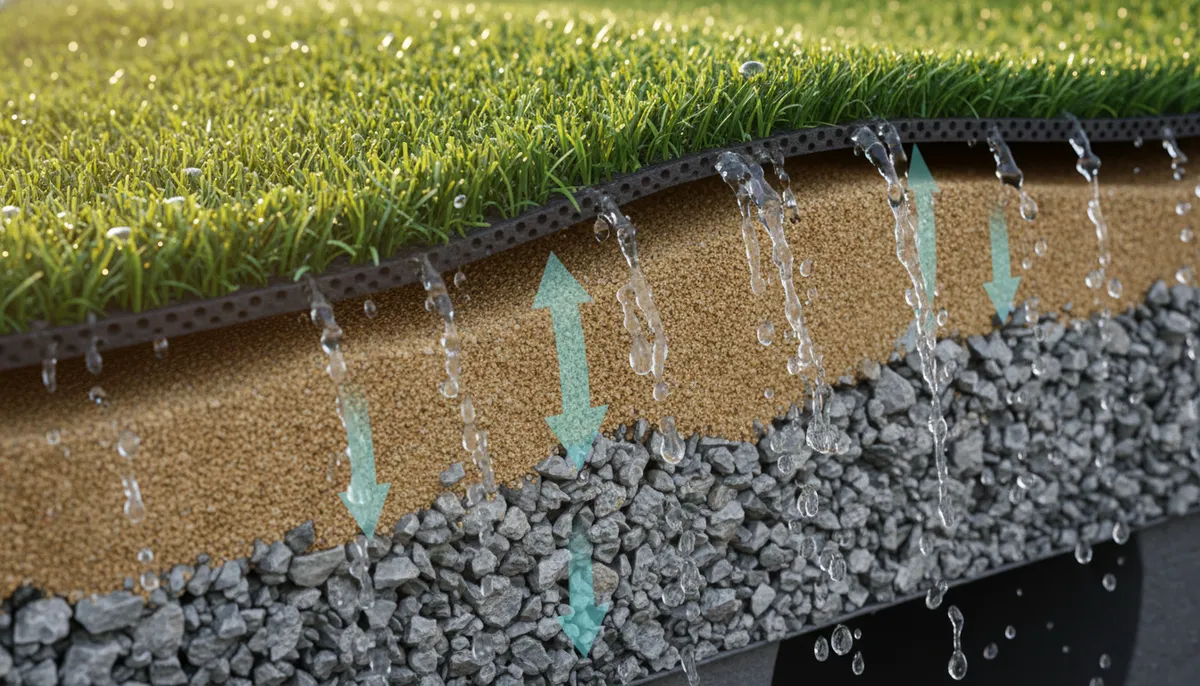
Proper slope planning during this stage ensures water drains away from buildings and structures — a critical detail for synthetic grass drainage performance. Getting this step right sets the entire project up for success.
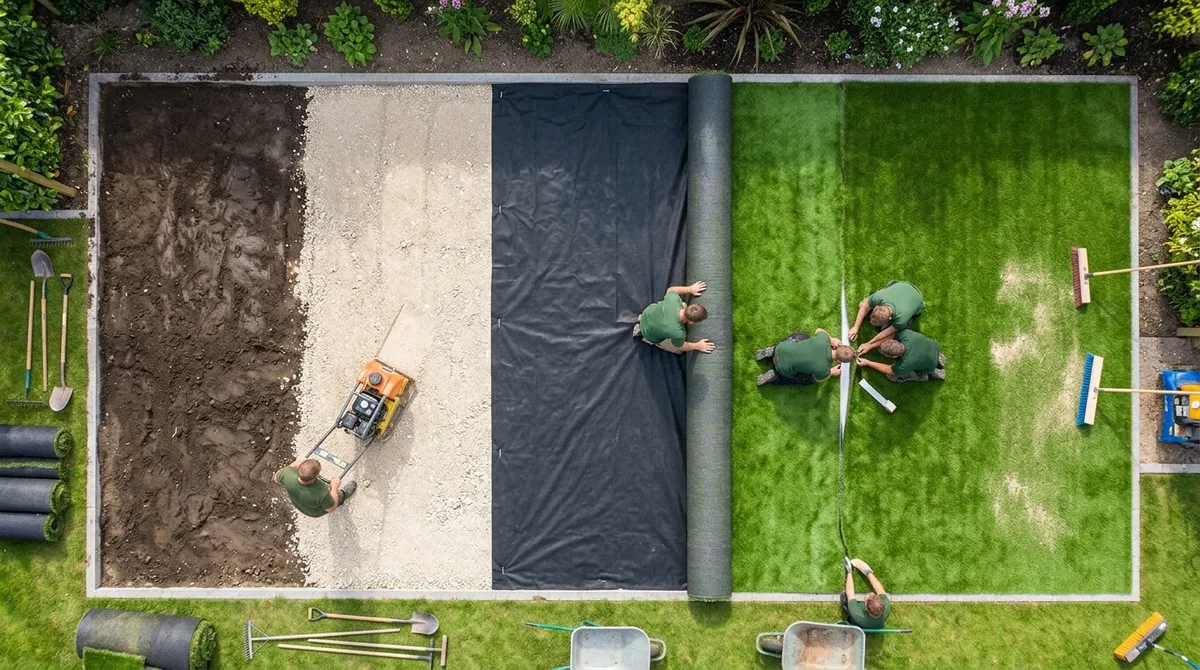
Step 2: Excavation and Ground Preparation
Once the site is assessed, it’s time to remove everything that’s currently there. This step involves excavating the existing soil, grass, roots, and debris to create a clean slate for your new turf base. Standard excavation depth typically falls between 3 and 4 inches, though it can range from 2.5 to 4 inches depending on your specific site conditions and soil type.
This depth is carefully calculated to accommodate the base layer materials AND the turf itself, while still sitting flush with surrounding surfaces like pavers, walkways, or driveways. Precision here prevents tripping hazards and gives your yard a clean, polished look.
After excavation, the ground is graded and leveled. Any low spots are filled and compacted. This step is physically demanding, and it’s one of the biggest reasons why getting artificial grass installation right often comes down to professional expertise and equipment.
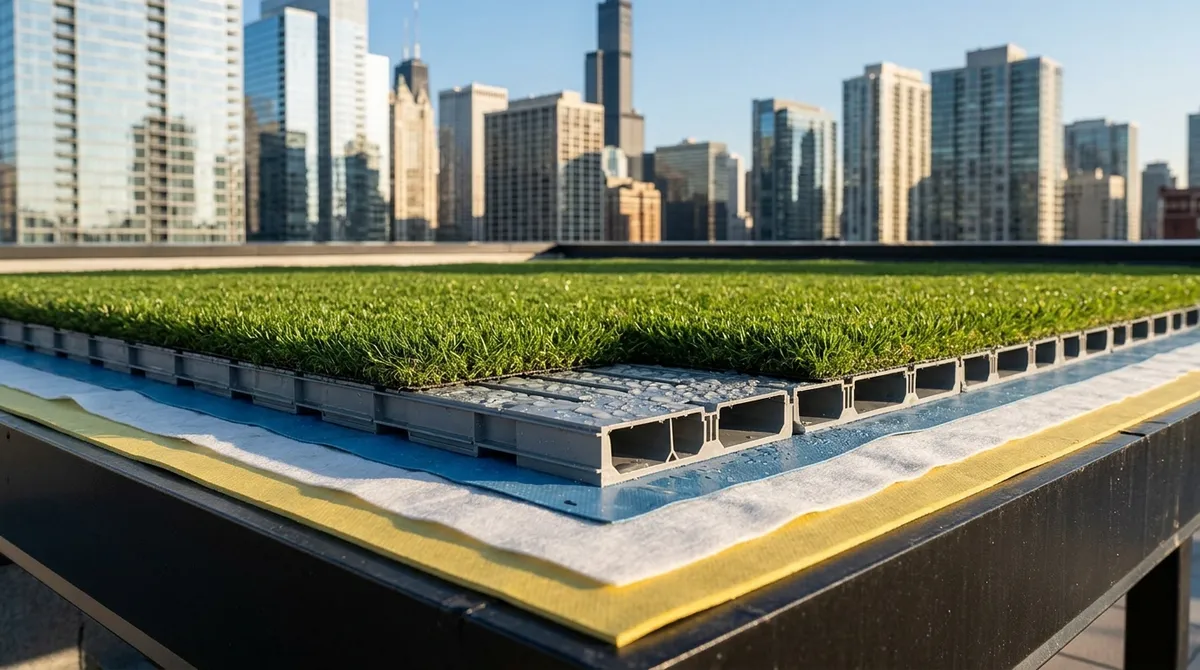
Step 3: Base Material Installation
This is arguably the most technical step in the 5-step process of artificial turf installation. The base layer is what makes your turf feel firm underfoot, drain properly, and hold up to years of heavy use. Get this wrong, and you’ll have problems no matter how nice the turf looks on top.
A quality base typically uses crushed stone (also called crushed aggregate) or decomposed granite. The recommended thickness for this layer ranges from 2 to 4 inches. Here’s what makes a great base:
- Proper depth of aggregate material (2–4 inches)
- Even distribution across the entire installation area
- Thorough mechanical compaction using a plate compactor
- A slight slope maintained for drainage (usually 1–2% grade)
- Weed barrier fabric installed on top of the compacted base
If you’re curious about which aggregate works best for your specific conditions, check out this guide on the best base materials for turf installation in 2026. Choosing the right material makes a noticeable difference in long-term performance, especially in Illinois where freeze-thaw cycles can shift the ground.
The weed barrier fabric placed on top prevents unwanted vegetation from pushing through while still allowing water to pass through freely. This is a small detail that makes a big difference over time — nobody wants weeds popping up through their artificial grass! Learn more about preventing weeds from growing in artificial turf to keep your lawn looking pristine.
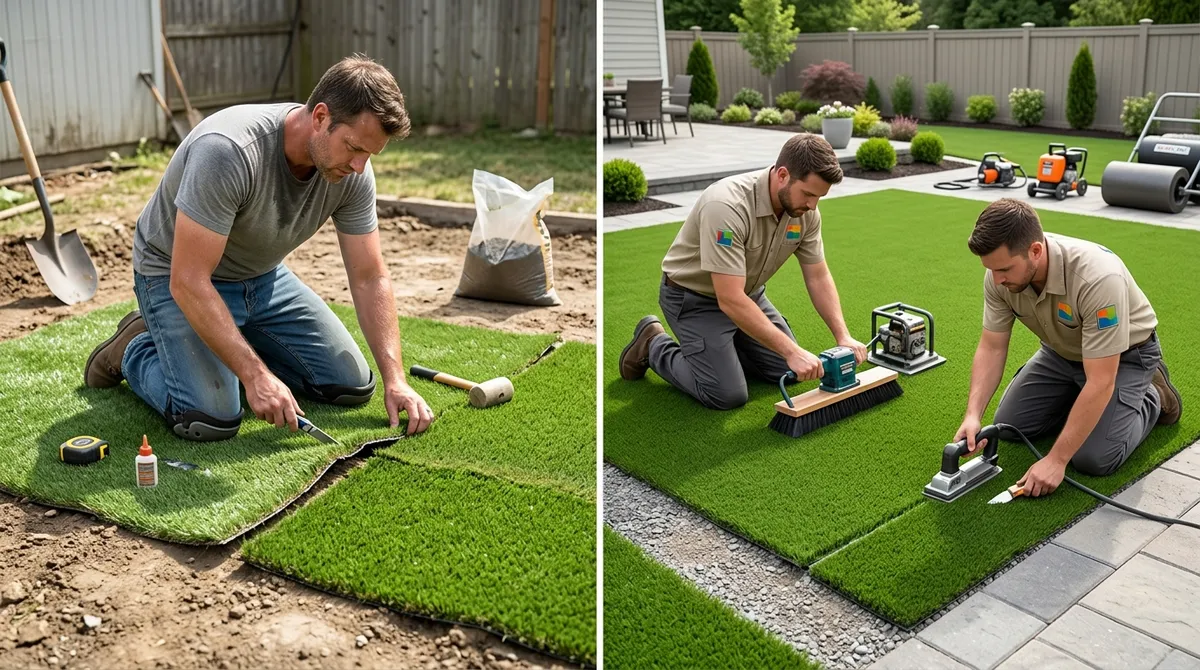
Step 4: Turf Laying and Seaming
Now for the fun part — rolling out and securing your artificial turf. This step requires patience and precision, especially if your installation area requires multiple pieces of turf joined together. Improper seaming is one of the most common mistakes in turf installation, and it’s exactly why professional results look so much cleaner than DIY attempts.
Here’s how professional turf laying works:
- The turf rolls are carefully positioned and cut to fit the space
- Pieces are aligned so the grain (blade direction) runs the same way
- Stitch lines are matched precisely where pieces meet
- Seam cloth is laid underneath the joining edges
- Synthetic adhesive is applied between sections for a seamless look
- A gap of 1/4 to 1/2 inch is left at borders and corners for finishing
The goal is a surface that looks like one continuous piece of green grass. When done correctly, seams become virtually invisible. This is a key difference you’ll notice when comparing common turf installation mistakes in Chicago versus professionally executed work.
For commercial properties, rooftop terraces, and other unique spaces, precise turf layout planning is even more critical. If you’re a commercial property manager or urban condo owner exploring options for elevated spaces, take a look at how rooftop terrace turf design can transform your space.
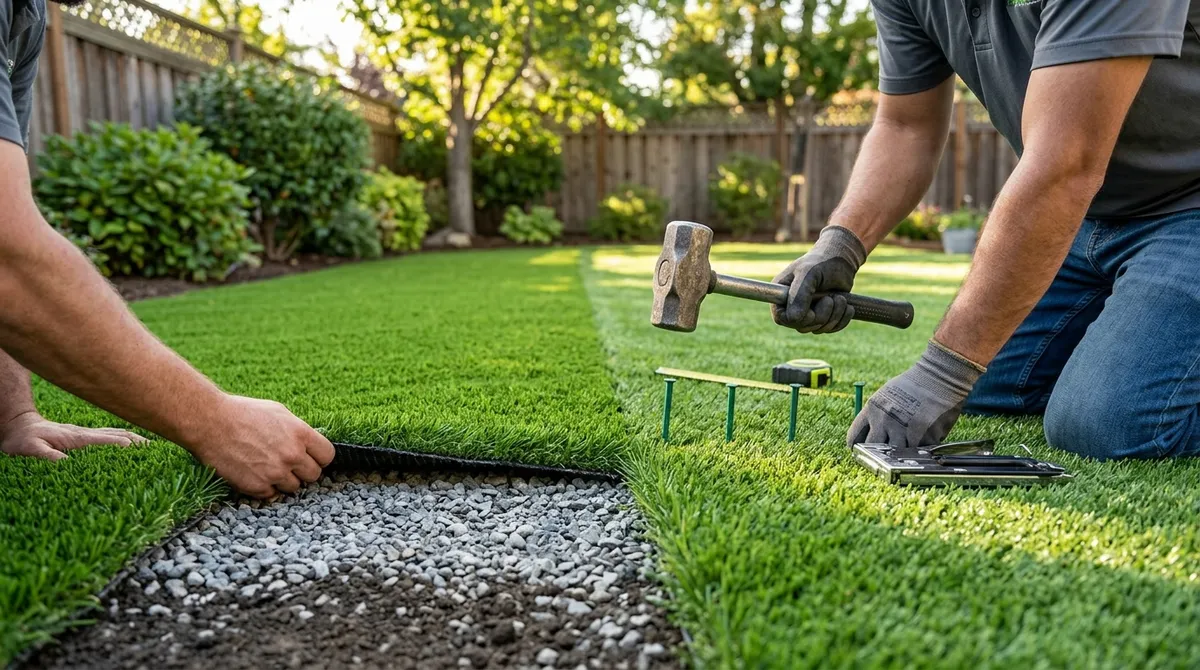
Step 5: Securing, Infill, and Finishing Touches
The final step in the 5-step process of artificial turf installation is all about locking everything in place and making it look amazing. This stage includes perimeter securing, infill application, and fiber grooming.
Here’s what happens during the final step:
- 5–8 inch nylon landscape spikes are driven along perimeter edges every 3–6 inches (nylon, not galvanized steel, which can rust)
- 6-inch landscape staples reinforce seams for added stability
- Infill material (typically crumb rubber, sand, or silica) is spread evenly across the turf surface
- A power broom or stiff brush lifts the synthetic fibers upright
- A final inspection ensures everything looks level, secure, and natural
The infill material is what gives artificial turf its bounce, cushion, and realistic feel underfoot. There are several options available depending on your use case — families with kids, pet owners, and athletic spaces each benefit from different infill types. You can explore the 9 infill types for artificial grass that actually work to find the right match for your needs.
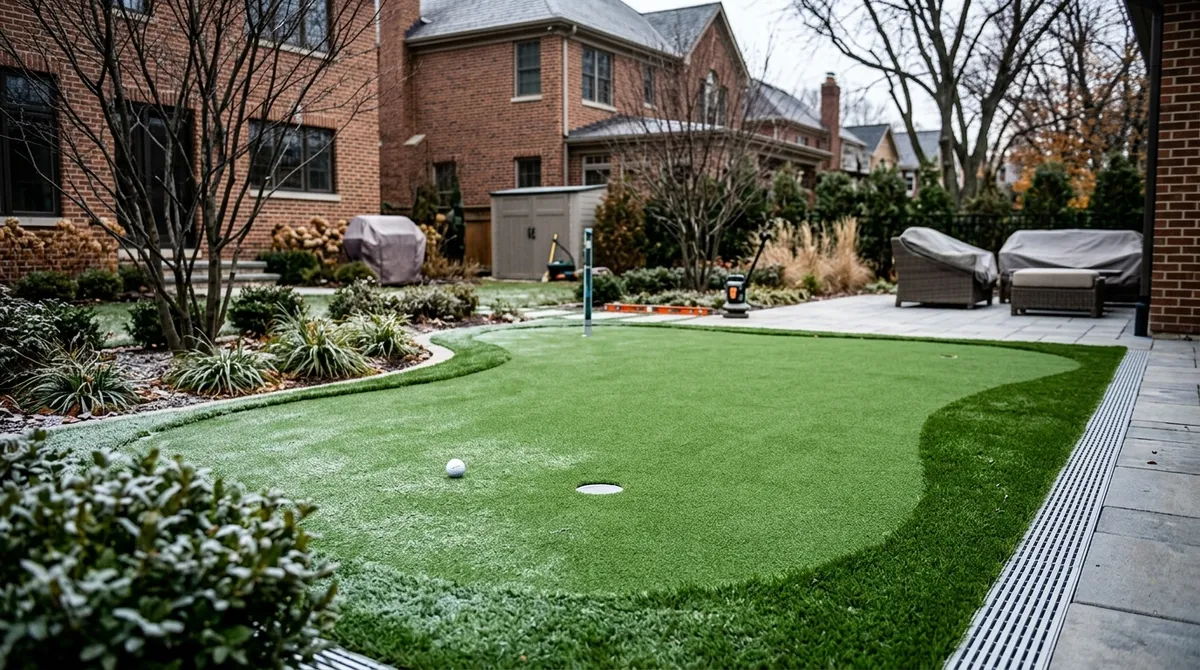
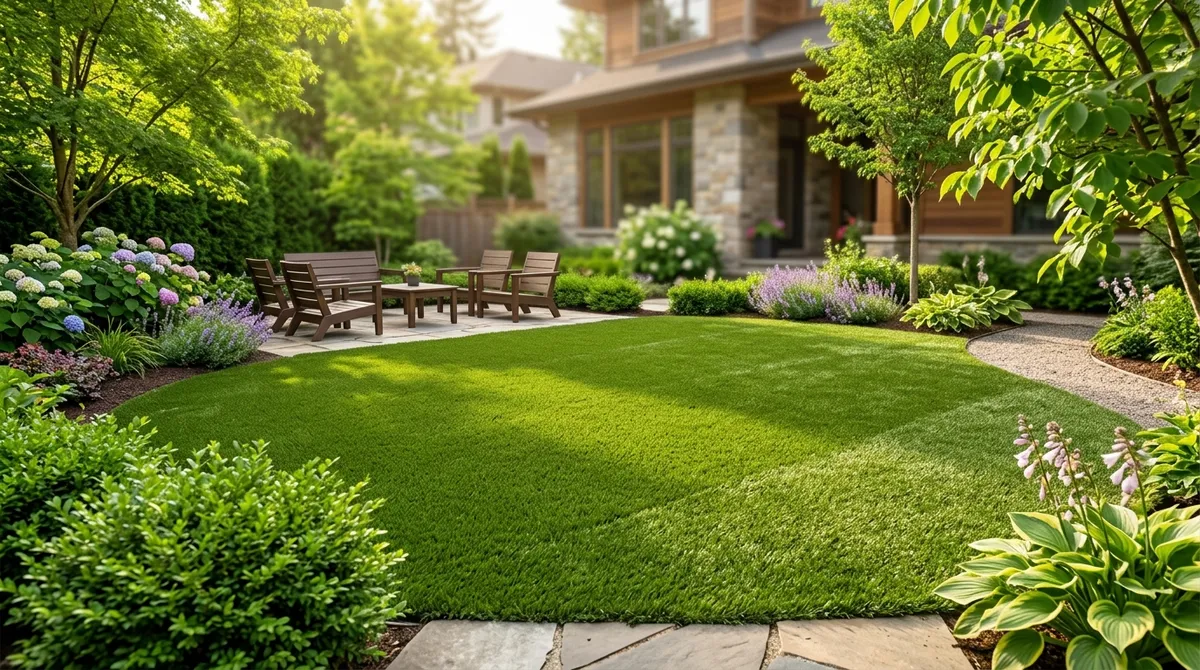
Brushing or grooming the fibers at the end is a step that makes a big visual difference. It lifts the blades into an upright position, giving the turf a fresh, vibrant appearance that closely mimics natural grass. Without this step, the surface can look flat and matted — not the look anyone is going for!
Quick Comparison: DIY vs. Professional Artificial Turf Installation
Wondering whether to tackle this yourself or hire a professional? Here’s a side-by-side look to help you decide:
| Factor | DIY Installation | Professional Installation |
|---|---|---|
| Upfront Cost | Lower | Higher |
| Long-Term Cost | Often higher (fixes/redo) | Lower (done right first time) |
| Drainage Quality | Variable | Optimized and guaranteed |
| Seam Visibility | Often noticeable | Nearly invisible |
| Time Required | Several days (weekends) | 1–3 days typically |
| Equipment Needed | Must rent or buy | Provided by installer |
| Turf Lifespan | Shorter (10–12 years avg) | Longer (15–20 years avg) |
The numbers tell a clear story. Professional installation delivers better results and greater long-term value. If you want to understand more about artificial turf lifespan in Chicago, it’s worth reading up before you make your decision.
What to Expect After Installation
Once your new artificial lawn is installed, the care routine is refreshingly simple compared to natural grass. There’s no mowing, no fertilizing, and no irrigation system required. That said, a little routine maintenance goes a long way in keeping your turf looking its best year after year.
Here are a few simple post-installation care tips:
- Rinse the surface occasionally to remove dust and debris
- Brush fibers upright a few times per year using a stiff broom
- Remove leaves and debris promptly to prevent buildup
- Address pet waste quickly to maintain hygiene and prevent odor
Pet owners will be especially happy to know there are easy methods for cleaning artificial turf from pet waste that keep things fresh and sanitary. For a full overview of keeping your turf in top shape, check out these artificial turf maintenance tips that keep it looking new.
6 Key Takeaways About the Turf Installation Process
Let’s wrap things up with the most important points to remember about the 5-step process of artificial turf installation. Whether you’re planning a backyard makeover or a large commercial project, keep these in mind:
- Site assessment is non-negotiable. Skipping this step causes drainage problems and uneven surfaces down the road.
- Excavation depth matters. The standard 3–4 inch removal depth creates proper room for your base layer.
- Your base layer is everything. A 2–4 inch compacted aggregate base ensures stability, drainage, and longevity.
- Seaming requires skill and the right adhesives. Poor seams are the most visible sign of an amateur installation.
- Securing the perimeter properly prevents shifting. Nylon spikes every 3–6 inches along the edges keep everything locked in place.
- Grooming the fibers is the finishing touch. Brushing lifts the blades upright for a natural, vibrant appearance.
For those interested in the broader picture of the key stages of the artificial turf installation process, this overview gives you a strong foundation for making informed decisions about your project.
Ready to Transform Your Outdoor Space?
At Serenity Landscape Group, we’ve spent over two decades helping homeowners and businesses across the greater Chicago area create outdoor spaces they truly love. From backyard lawns to rooftop terraces and commercial properties, our experienced team follows every step of the artificial turf installation process with precision and care — so you get a result that looks stunning and stands the test of time.
Our work doesn’t stop at turf. We offer complete outdoor transformations including paver installations, retaining walls, fire pits, pergolas and pavilions, and landscape lighting and sound. Whatever your vision, we’re here to bring it to life. Curious about the resources available to landscaping professionals in Illinois? The ICPI Certified Installer standards help guide professional installers toward best practices in outdoor surface work — and it’s a benchmark our team takes seriously.
If you’re ready to say goodbye to lawn maintenance and hello to a beautiful, green yard that looks great every season, we’d love to chat. Schedule your free estimate today and let’s start planning the outdoor space you’ve always wanted — or give us a call directly to speak with our friendly team right away.
FAQs
Q: How deep does the soil need to be excavated before artificial turf installation?
A: Great question! The standard excavation depth is 3 to 4 inches, though it can range from 2.5 to 4 inches depending on your soil type and site conditions. This depth creates the right amount of space for your base layer materials and the turf itself, so everything sits flush and drains properly.
Q: What is the best base material for artificial turf installation?
A: Crushed stone or decomposed granite are the top choices used by professional installers. A 2 to 4 inch layer of these materials, properly compacted, creates a firm, stable foundation that supports the turf weight and manages water runoff effectively. The right base material can significantly extend the life of your artificial lawn!
Q: How do you create invisible seams when installing artificial grass with multiple pieces?
A: Achieving seamless joints requires matching the stitch lines on adjacent pieces, aligning the grain direction, and using seam cloth combined with synthetic adhesive underneath the joining edges. A gap of 1/4 to 1/2 inch is left at borders for finishing. When done by an experienced professional, seams become virtually undetectable!
Q: How long does the artificial turf installation process typically take?
A: For most residential properties, a professional team can complete the full 5-step installation process in 1 to 3 days. The timeline depends on the size of the area, the complexity of the layout, and site conditions. Larger commercial installations or complex spaces with multiple seams may take a bit longer.
Q: What type of spikes should be used to secure artificial turf perimeters?
A: Nylon landscape spikes are the preferred choice — not galvanized steel, which can rust over time and compromise the installation. These spikes should be 5 to 8 inches long and placed every 3 to 6 inches along the perimeter edges, with 6-inch landscape staples used at seams for extra reinforcement and stability.